
1. Selecting Cable Length When using the Auto mode for setup the 990 will look for major faults and therefore may use a long pulse width. At times you may wish to look at smaller sections of cable. From Main Screen:
- Select Setups (F4)
- Select Edit (F1)
- Use I and G keys to select Pulse Width/Distance
Alternative: Use TDR Auto-Test
-
Press Pulse Width (F1)
-
Use Left and Right keys to scroll Pulse Width
20ns = 500' 100ns = 2000' 500ns = 4000' 1000ns = 6000' 2500ns = 12000' 5000ns = >12000'
Caution: When using small pulse widths on long cable the display will show only maximum length for pulse width, not the end of the cable.
2. Identifying Bridged Taps It is often difficult to distinguish between bridged taps and other reflective measurements. When the auto TDR indicates Bridge Tap another test should be done to verify that reflection is a bridged tap. Either run an opens test or resistive length. Compare the resulting measurements to the length shown on the TDR. If the lengths are different by about the amount shown as a bridged tap on the TDR, then expect a bridged tap. The first square indicates the beginning of the bridged tap and second square indicates the end or length. It is important to note that the TDR indicates some sort of reflective fault at that point in any case. Sample Fault Traces (TDR AutoTest)
 High resistance open at 2,992 feet.
 Bridge tap at 2,997 feet. Block cursor shows end of tap
 Load coil at 2,997 feet.
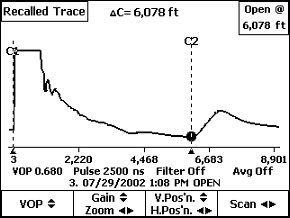 Open at 6,078 feet
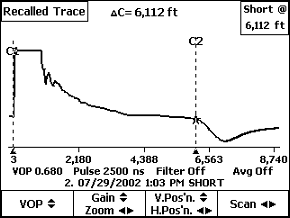 Short at 6,112 feet
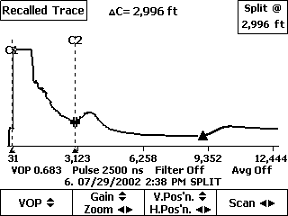 Split at 2,996 feet