Accurate MPO fiber testing requires accounting for the loss of Test Reference Cords (TRCs), so they don't skew your results. This process, known as "setting the reference," is a vital step — get it wrong and every measurement will be incorrect. Master this process like a wizard with the Fluke Networks CertiFiber™ Max Optical Loss Test Set.
Understanding the why and when
To accurately measure the total insertion loss of a fiber link, you must include the loss of both the first and last connectors — after all, they are part of the link once it's live. Because it's impossible to calculate the loss of a single connector in isolation, they must be measured as a mated pair. This is where TRCs come in.
TRCs are high-quality cables that mate with the first and last connectors of a link, connecting your main and remote test units to the device under test. Before testing, you must calibrate your tester to 0 dB to reference out the loss of the TRCs. Think of this like placing a bowl on a scale and zeroing it to ensure you measure only the weight of the contents. Correctly setting the reference to account for TRC loss is essential. If it's done incorrectly, every subsequent test result will be wrong.
For the best results, set your reference at the job site before testing and again at regular intervals throughout the day. You must reset the reference:
- Whenever you change an input module to accommodate a different test setup.
- Any time you disconnect the TRC from the tester's output port — even if you plug it right back in.
- Whenever you see excessively negative loss measurement, which often signals a dirty end face or an insufficient warm-up period.
- If several hours have passed between setting the reference and testing. It's wise to reset the reference, because TRCs can become contaminated or drift over time, or the tester may have powered off to save battery life, which can result in the reference being off. The CertiFiber Max tester simplifies this by tracking and displaying the time elapsed since the reference was set and the time between tests.
Setting up the tester and preparing the inventory
When it comes to setting the reference, you don't need to overthink it when using the CertiFiber Max. Much like our popular duplex CertiFiber Pro Optical Loss Test Set, the Max tester features a built-in Set Reference Wizard that walks you through every step to prevent incorrect referencing. There are key steps to take before you begin:
- Warm-up: Ensure your main and remote test units are turned on and have warmed up for at least 15 minutes (longer if they start out above or below ambient temperature). Setting the reference with a cold tester can lead to inaccurate negative-loss results.
- Setup: Select your specific test parameters, including the connector type (MPO-12, MPO-16, MMC 24, etc.), pinned or unpinned configuration, fiber type, polarity, number of connections, and test limit. Finally, choose the reference method you're going to use. The 1-jumper reference method is the default and the one you will almost always use.
- Inspect: Contamination is a deal breaker. Inspect the fiber end faces on your TRCs, verification cords, and device under test. Clean, if necessary, and reinspect. Even brand-new TRCs fresh out of the bag can be contaminated and should be inspected. It's best to inspect the connectors just before mating them, so they don't pick up contamination while waiting. They can be inspected all at once but then be careful where you put them while waiting to mate them (that is, far from the ashtray and powdered donuts). Don't put the dust caps on them after inspection; the caps can harbor contaminants.
Once you've set up your tester, tap Set Reference to open the wizard. The first screen displays a list of required parts based on your specific test parameters. This includes the necessary input modules and TRCs for both the remote and main units, as well as the verification cord.
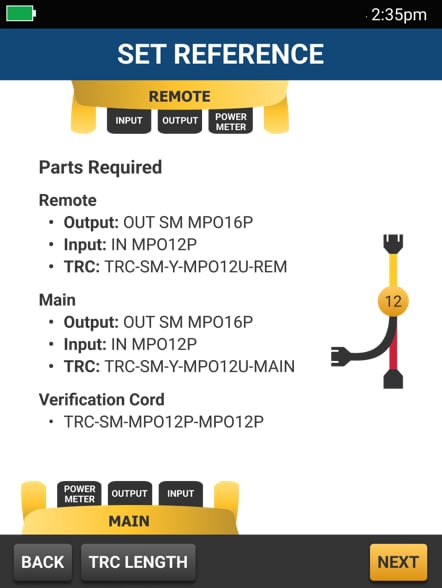
The first screen of the Set Reference Wizard lists all the parts needed for setting the reference, including the input modules and TRCs for the remote and main units, and the verification cords. It also shows an image of the color-coded TRC.
For foolproof reference setting, the Y-cable TRCs used with the CertiFiber Max are color-coded to match the ports on the tester. These color codes are the same whether the input connector is a traditional MPO or an MMC very small form factor (VSFF) connector.
- Red (transmit): Connects to the tester's red 16-fiber MPO output (source) port.
- Yellow (link): Connects to the single-mode fiber link you're actually testing.
- Black, grey, or white (receive): Connects to the input (meter) port. The color depends on your fiber count — black for 12, grey for 16, and white for 24.
Navigating the wizard
Once you've gathered your inventory, the Set Reference Wizard uses color-coded animation to guide you through the process of setting the reference and verifying the TRCs.
- Connect the red output branch of the TRCs to the red output ports on the main and remote units.
- Connect the yellow branch of the TRCs to the input ports on the main and remote units.
- Set the reference.
- Once the reference is set, remove the yellow branch from the input ports on the main and remote units and connect to the verification cord. Never disconnect the red branch of the TRCs from the output ports. Doing so changes the power levels entering the fiber, rendering your reference invalid.
- Connect the receive branch (black, grey, or white) of the TRCs to the input ports on the main and remote units. From here on, you will touch only the yellow branch of the TRCs.
- Verify the TRC performance. The tester displays the TRC results, along with a date/time stamp ID. These are automatically saved to prove that your TRCs were in good condition and that your test setup was valid.
- If you get a warning that the TRC results are outside the expected range, reinspect and clean the TRC and verification cord, as well as the output port on your tester. Then restart the procedure.
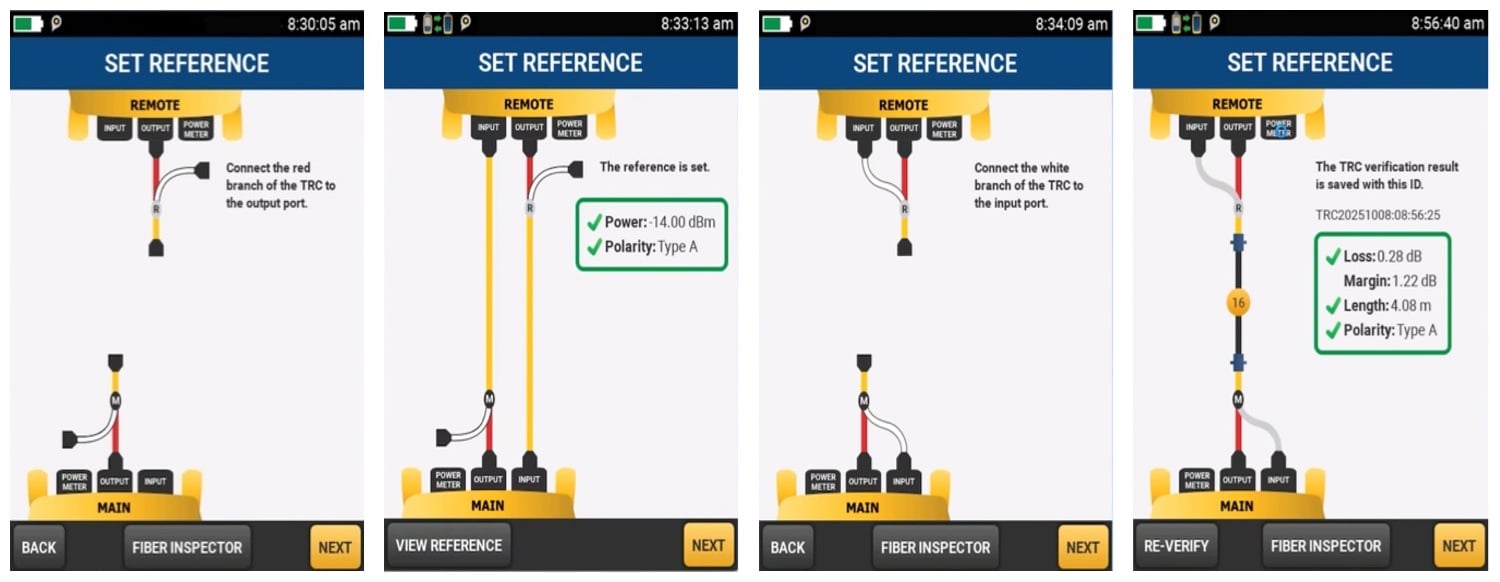
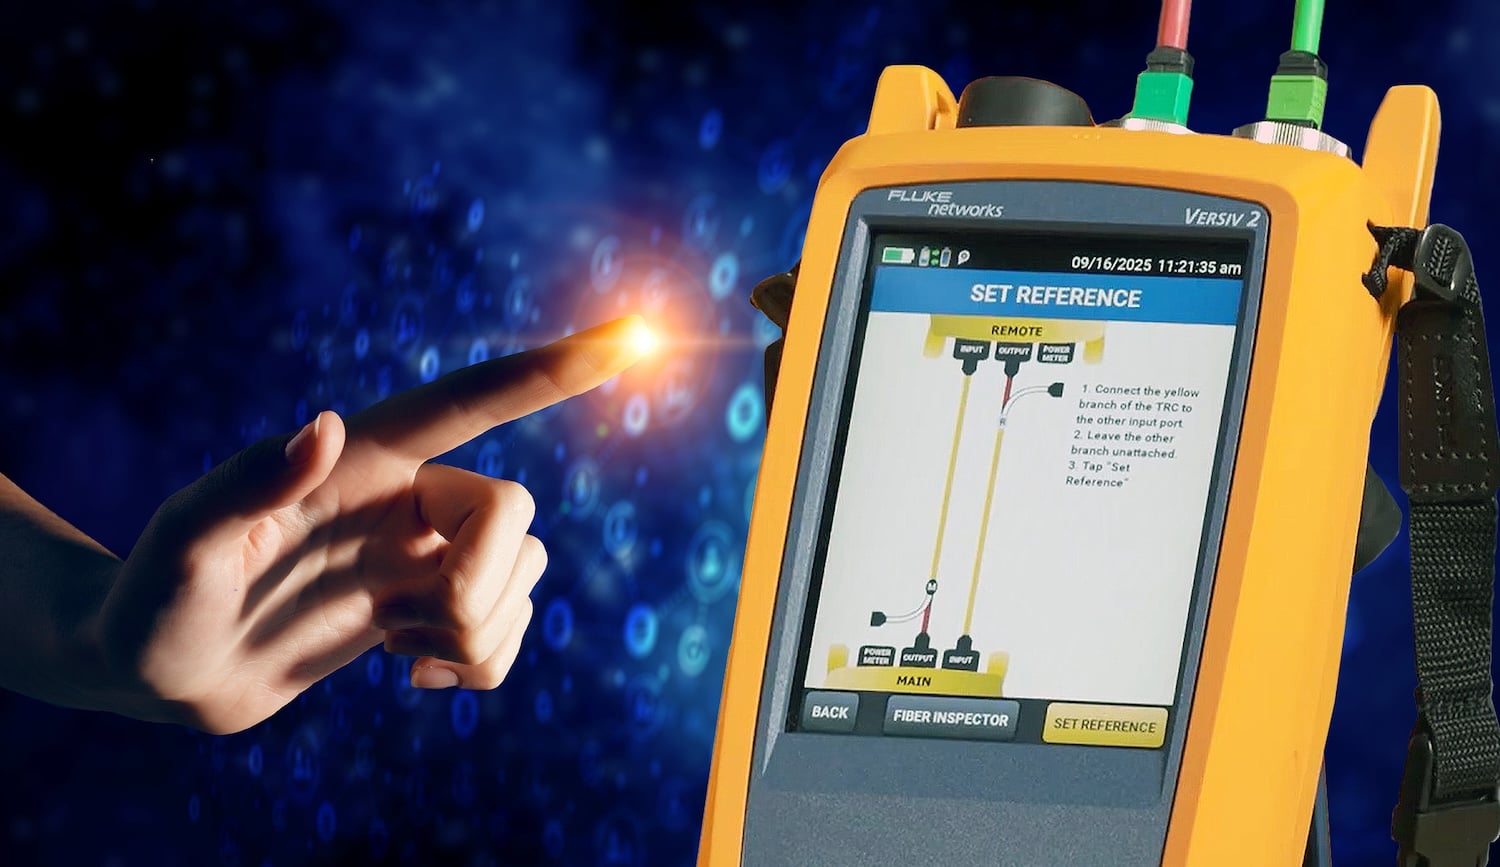
The Set Reference Wizard uses color-coded animation to guide you through the process of setting the reference and verifying TRCs. The FIBER INSPECTOR button makes it easy to perform this important step at relevant times without leaving the wizard.
Testing with confidence
Once the reference is set and the TRC is successfully verified, you're ready to test! Simply swap the verification cord for your actual fiber link.
At any time during testing, you can re-verify the TRCs to ensure your sources have stabilized and prevent degraded TRCs from compromising your project's results. Fluke Networks typically recommends verifying your TRCs every 288 tests. CertiFiber Max even tracks how many tests you've performed, lets you set custom TRC test count limits, and alerts you when it's time to re-verify.
In the world of high-speed MPO fiber links, there's no room for "close enough." With the CertiFiber Max Set Reference Wizard guiding your setup, you can ensure your reference setting is rock-solid and test with the confidence of a true fiber expert.